Showing posts with label food. Show all posts

Saturday, April 12, 2014

Sausage Cheese Biscuits


Last week, our Bible class at church had a breakfast potluck.  We're about to start a new study on marriage and parenting, and it was a great way to kick off the new study and get to know some of the new faces in class.  And of course, it didn't hurt that the food was A-MAZING! I rarely have the time (or energy!) to cook big breakfasts, so I forget how delicious they can be!

I made these Sausage Cheese Biscuits, and they were a hit. Several people commented on how good they were, so I thought I'd post the recipe.  Sorry no step-by-step photos, but they are super easy!

The great thing about this recipe (other than how delicious it is!) is that it only requires four ingredients: Bisquick, Sausage, Cheese Whiz and Milk.

I know, I know...Cheese Whiz?! I'm not gonna lie...the stuff kind of grosses me out.  But it makes these biscuits really moist and delicious.  I'm sure you've already figured out that this is not one of my healthier recipes.  If you're looking for healthy, check out these Salmon Patties or  this Quinoa Avocado Salad.  But if you're looking for a delicious breakfast (or anytime) splurge, read on.

I actually created this recipe by accident!  Last year during the holidays, I was asked to bring sausage balls to a get together. I dug out my grandmother's recipe, bought the ingredients, and went to work.  I combined the sausage, Bisquick, Cheese Whiz, and milk and began to stir.  Then I suddenly realized I had forgotten to preheat the oven.  I went over to check the oven temperature on my recipe card, and as I was glancing over the recipe, I noticed that beside "1 jar Cheese Whiz" there was a little note in parentheses that said "8 oz." Hmmm...I was pretty sure the jar I just put in was more than that.  I went to check, and sure enough, it was 15 ounces. 

Oops! The ingredients were already mixed together, so there was no way to take any of the Cheese Whiz out.  I couldn't double the recipe because I didn't have any more sausage.  And I really didn't want to go back to the store to get more.  So I decided to experiment a little.  I added some extra milk and Bisquick and hoped they would turn out okay.

I was pleasantly surprised when they turned out even better than the original!  They were moist, cheesy, and delicious.  Definitely more biscuit-y than your average sausage balls, but I really liked that.  Everyone kept going on and on about how good they were, so I guess it was a happy accident! 

I decided to rename them "Sausage Cheese Biscuits" to more accurately describe what they are, but feel free to call them whatever you want!


Sausage Cheese Biscuits

4 cups Bisquick
16 oz ground sausage
1 15 oz jar Cheese Whiz
3/4 cups milk

Pre-heat oven to 375.  Combine all ingredients in a large bowl and mix well (you may have to use your hands!).  Roll into balls (mine were about 1 1/2 inches in diameter) and place on a baking sheet about 2 inches apart.  Feel free to make them smaller or bigger depending on what you like, but remember they will expand quite a bit in the oven.  Bake for 15-20 minutes or until tops are golden brown.

Serve warm or store in the refrigerator. If they are cold, I recommend warming in the microwave before serving.  These also freeze really well! 

Enjoy!

~Rachel


Friday, April 4, 2014

Quinoa Avocado Salad


If you get on Pinterest much or read many food blogs or magazines, you've probably noticed an abundance of quinoa recipes popping up over the last few years. I first tried quinoa several years ago when my family visited Cusco, Peru after one of our medical mission trips, and I loved it. At that time, it was very hard to find in the States, but in recent years it has really grown in popularity.  Now you can find it in almost any grocery store!

Quinoa has a unique flavor and texture, and it is so good for you! It's high in protein and fiber, and it's gluten free.  It makes a great side dish, salad ingredients, or you can even substitute it for meat in a soup or casserole.  What's not to love?!

Lately I've been pinning lots of quinoa salad recipes, and decided try my hand at creating my own. I actually used a quinoa/brown rice blend that I had, but I think any type of quinoa or quinoa blend would work well.  Make sure to read the package instructions, as some quinoa needs to be rinsed before cooking.  Mine was pre-rinsed, so I didn't have to worry about that.  To the quinoa, I added grape tomatoes, spinach, avocado, feta cheese, olive oil, lemon juice, and red onion.

Now a word about the onion...almost every quinoa salad recipe I saw called for some type of onion (red, green, or white).  I like the flavor onions give when they are cooked in a dish, but I am not a fan of raw onions.  Something about the strong taste and texture...ew!  When I use onions, I usually chop them with a food processor so finely that they are almost pureed.  I like to do several at once and freeze them in 1/2 cup portions that I can pull out whenever I need them. 

For this salad, I pulled out some frozen red onion and cooked it with the quinoa.  That way, I got a mild onion flavor without any big crunchy pieces. Perfect!

I wasn't really planning on posting this recipe, so I didn't take pictures of the whole process.  But the finished product was just so pretty and colorful, I decided to snap a few. Then we tasted it, and I knew I had to post it.  Feel free to add any other ingredients you like.  I think cucumber would be really good, and olives too if you like them.  I, however, deplore olives, so you will never find them in one of my recipes. :)  This summer, I might try it with fresh herbs.  I think basil and oregano would be delicious!

I hope you enjoy this as much as we did!


Quinoa Avocado Salad


1/2 cup uncooked quinoa or quinoa/brown rice blend
1 cup water
1/4 cup finely chopped or pureed red onion
1 pint grape tomatoes, halved or quartered
1 cup chopped spinach
2 Tablespoons olive oil
2 Tablespoons fresh lemon juice
1/2 teaspoon salt
1 avocado, diced
1/2 cup feta cheese, plus more for topping

Combine quinoa, onion, and water in a medium saucepan.  Cook according to quinoa package instructions, and allow to completely cool.  Mix together quinoa, tomatoes, and spinach.  In a small bowl, combine olive oil, lemon juice and salt.  Add to quinoa mixture and mix well.   Gently fold in avocado and feta cheese.  Sprinkle with additional feta if desired when serving. 

Enjoy!

~Rachel


Sunday, December 15, 2013

Secret Ingredient Fudge


One of my family's holiday traditions is fudge.  And this is not just any fudge.  It is creamy and delicious, and it has a secret ingredient!  When I was in school, my mom and I would make batches and batches for all of mine and my brother's teachers and all of our friends and family.  Then after Jake and I got married, I started making it for all of our friends and co-workers. 

Everyone loves it!  It's very rich and creamy, but it's not overly sugary like some kinds of fudge.  And it's always fun to make people try to guess the secret ingredient when they tasted it for the first time. :)

I've gotten all kinds of guesses...coconut...butterscotch...Nutella...cream cheese...Only one person has ever been able to guess it!  She was a co-worker of mine back who was several months pregnant and claimed that her pregnancy hormones had given her superhuman taste and smell.  Ha! :)

So...Any guesses???

Now let me warn you, it's going to sound really weird!  It's something you would probably never consider putting in fudge and actually sounds like it would be disgusting combined with chocolate.  But I promise you, it is anything but disgusting!

Are you ready???

Here it is:


That's right...Velveeta cheese!!  I know it sounds crazy, but trust me, it is amazing!

The second best thing about this fudge (other than it's delicious taste) is that it is super easy!  It does not require a candy thermometer, testing for "soft-ball stage" or anything like that.  The process is very simple, and you only need five ingredients:

Velveeta, Butter, Powdered Sugar, Cocoa, and Vanilla (preferably Mexican)

 
First, cube your butter and Velveeta and put it in a double boiler.


Yes, this is A LOT of butter and cheese.  I would not recommend making this recipe too frequently.  But once a year, it is definitely worth the calories! :)

Slowly melt the butter and cheese in the double boiler, stirring frequently.  If you don't have a double boiler, I imagine you could do this in the microwave.  Just make sure not to overheat it or the cheese may burn.


The cheese and butter will never fully incorporate.  It will look grainy and honestly a little gross.  But trust me, it will work.

While your cheese and butter are melting, sift together your cocoa and powdered sugar. 


Now the original recipe calls for 4 pounds of powdered sugar, but years ago, we decided it was better not to use the full amount.  The taste and texture are both better if you leave a little of the powdered sugar in the bag.  I forgot to take a picture of the bag after I was finished, but there was probably about an inch left in the bottom.

Make sure to use a pretty big bowl.  And make sure your bowl is heat-proof.


Once your butter and cheese are melted, pour it into the powdered sugar/cocoa mixture.


Add your vanilla and mix until everything is well combined.  It should look something like this:


Pour into two 9 x 13 pans (told you it made a lot!), and pat it out with your fingers until smooth.


We usually let it set up on the counter for a couple of hours before cutting it.  And we always cut pretty small pieces because it is VERY rich.  But also VERY delicious!  And it also freezes well if you want to make it ahead or have any leftovers.


This makes a great gift or dessert for a holiday party.  But if you make it, you must make people guess the secret ingredient before telling them!

Enjoy!

Secret Ingredient Fudge

1 pound Velveeta Cheese
1 pound (4 sticks) butter
4 pounds (or a little less) powdered sugar
1 cup cocoa
1 Tbs vanilla (preferably Mexican)

Cube Velveeta and butter and combine in a double boiler.  Melt over medium-high heat, stirring frequently. 

Meanwhile, sift together powdered sugar and cocoa in a large bowl.

Once Velveeta and butter are melted, pour into powdered sugar/cocoa mixture.  Add vanilla, and stir until well combined.

Pour into two 9 x 13 inch pans and smooth with fingers.  Let set up a couple of hours before cutting.

~Rachel

Sunday, November 17, 2013

Banana Bread Oatmeal


There's nothing better on a cold morning than a nice warm bowl of oatmeal!  I've experimented with all kinds of additions to my oatmeal, and this is one of my favorites.  I call it "Banana Bread Oatmeal." 

Now I'm not gonna lie and say it tastes just like banana bread because it doesn't.  It's oatmeal!  But it is quite delicious and healthy.  And, just like banana bread, it's a great way to use up ripe bananas. 

You can adapt this recipe to make as much as you want.  Jake's not a big oatmeal fan, so I usually just make enough for one, but you can easily double, triple, or even quadruple it to feed the whole fam!

Here's what you need:


  • Oats: I like to use old fashioned oats.  I think they have a better texture and flavor, but you could also use instant.
  • Banana: The riper the better!  Like I said, a great way to use up those brown bananas.  Use one banana per serving of oatmeal that you're making.
  • Milk: I like to use almond milk for oatmeal...makes it nice and creamy.  But I've also used regular and soy milk, and they work well too.
  • Flaxseed: This isn't essential, but it's so good for you!  Flaxseed is high in omega-3's and fiber, and you can't even taste it in the oatmeal.  I definitely recommend adding it!
  • Cinnamon and Nutmeg
  • Sweetener of choice:  I used maple syrup today, but brown sugar and honey are also delicious!

Pour your milk into a small sauce pan, and bring to a boil.  Be careful to watch so it doesn't boil over.  I speak from experience.

While the milk is heating, assemble your other ingredients in a bowl.  (I just use the same bowl I'm going to eat it out of.  Less to wash!)

Start with your oats...


Then add your banana.  I chopped it up into small pieces, but if it's really ripe you can mash it up.


Add your flaxseed, cinnamon, and nutmeg.  I don't really measure the spices, but I use quite a bit of cinnamon and just a dash of nutmeg.  A little goes a long way with nutmeg.

 
When your milk starts to boil, stir in oatmeal ingredients and turn the burner down to low.


Cook on low heat, stirring occasionally until it reaches desired consistency.  For old-fashioned oats, I cook about 5-6 minutes. 


If you want it thicker, you can always cook a little longer.  Or if it gets too thick, you can add a little extra milk.  Once it has reached your desired consistency, pour it into a bowl and sweeten to taste.


Easy, yummy, and healthy!  What more could you ask for? :)

Banana Bread Oatmeal

2/3 cup milk of choice (almond, soy, and regular all work well)
1/3 cup old fashioned oats
1 ripe banana, chopped or mashed
1 Tbs flaxseed
Cinnamon and Nutmeg to taste
Sweetener of choice (I recommend maple syrup, brown sugar, or honey)

Bring milk to over medium-high heat.  While milk is heating, combine all other ingredients except sweetener in a bowl.  When milk is boiling, stir in oatmeal ingredients and reduce heat to low.  Cook 5-6 minutes or until oatmeal reaches desired consistency.  Pour into bowl and sweeten to taste. 

~Rachel

Friday, November 8, 2013

Nana's Butterscotch Pie


I think every family has a signature dessert.  For my mom's side of the family, that dessert is my Nana's Butterscotch Pie.  Over the years, Nana has probably baked hundreds of these delicious pies for holidays, birthdays, and family gatherings.  And let me tell you, they are the stuff of legends.

My mom and her siblings having been known to have pie feuds.  Whole pies are taken and hidden in unlikely places.  Pieces of pie are stollen and replaced with empty plates when the eater is not looking.  I'm pretty sure I've seen my uncle eat half a pie in one sitting.  At breakfast.  This pie is that good!

Last Thanksgiving, I was blessed to spend an entire week at my grandparents' house in Ohio.  While I was there, I was determined to learn how to make Nana's Butterscotch Pie.  She walked me through the process step by step, and we made four pies in one day!  I took detailed notes and had intentions of becoming a regular Butterscotch Pie baker when I returned home.

A few months later, however, sweet Luke was born.  For awhile I was doing well just to get dinner on the table, much less bake homemade pies!  But lately things have finally settled into more of a routine.  And Thanksgiving is right around the corner again!  This year, Jake's family is coming to visit, and I would love to introduce them to the deliciousness of Butterscoth Pie.  So I figured I had better do a practice round to make sure I remembered everything from last year.  (Okay, maybe I just wanted an excuse to eat pie.  But who can blame me?!)

Last weekend Luke and I went over to my parents' house, and they babysat while I made pie.  It was definitely a win-win for everyone! 

So here's what you need to make this amazing pie:
Flour, brown sugar, eggs, butter, milk, salt, and vanilla
Also, you need a prepared pie crust.  Now I must admit, when I make pies I usually go with store-bought pie crusts.  They are so much easier and taste pretty good.  Plus the few times that I have attempted a homemade crust, I have not been pleased with the results.  But the other day I was just thinking how I would really like to perfect the art of pie-crust making.  So I decided to give it another try.

I used the Pioneer Woman's "Perfect Pie Crust" tutorial, which you can find here.  I am a big fan of the Pioneer Woman.  Every recipe I've ever made of hers has turned out great.  Plus I love her step by step photos and instructions!  According to PW, the secret to a perfectly flaky pie crust is a little bit of vinegar (sounds weird, right?) and freezing the crust for about fifteen minutes before rolling it out.  I did not take photos of my crust-making process, but I was very happy with the outcome!  My crust did not look nearly as pretty as hers, but it was flaky and delicious.  PW knows her stuff!

So, regardless of whether you make or buy your crust, poke some holes in it with a fork.


Bake it at 400 for about 10 minutes or until the edges are golden brown.  It should look something like this:

 
Like I said, my crust wasn't the prettiest.  I think I need a little more practice rolling it out...definitely one of those things that's not as easy as it looks!  But it was quite tasty, and that's what matters right?
 
Okay, now for the best part...the filling!
 
First, wisk together your flour, brown sugar, and salt in a medium sized bowl.


Separate your egg whites and yolks.  If you're going to make meringue, save the whites (more on this later).  Beat the yolks a little.


Pour your milk into a medium saucepan.  According to Nana, you need to use at least 2% milk to get the right texture and flavor. 
 
 
My recipe card for Butterscotch Pie says to "scald" the milk.  I was always confused about what exactly that meant, but with Nana's help last year, I finally figured it out.  :)
 
Turn the burner on to medium heat and start stirring the milk with a wisk.  Continue stirring as the milk heats.  It will start to steam and then tiny bubbles with form along the edges of the pan.  Do not let it come to a boil, and be sure to stir continuously or it will burn.  Once your milk is steaming and you see those tiny bubbles, it is scalded!
 
 
Now take the dry ingredients that you combined earlier and slowly wisk them into the scalded milk.


Cook over medium heat while wisking constantly until the mixture is thickened.  I forgot to time this, but I'm thinking it was around 5-10 minutes.
 
 
Once it is thickened, take several spoonfulls of the milk mixture and stir it into your egg yolks. 
 
 
This is called "tempering" the eggs. If you add the eggs directly to the hot mixture, they will curdle and you'll end up with little pieces of scrambled egg in your pie filling.  Not exactly what we're going for...
 
Now stir your tempered eggs to the milk mixture.
 
 
Continue cooking over medium heat, stirring constantly.  I used a heat-proof rubber spatula so I could scrape along the sides and bottom of the pan to keep it from sticking.
 
 
Allow to come to a boil and cook several minutes, until thick.  Then remove from the heat and stir in your butter and vanilla.
 
 
Stir until butter has melted and mixture is nice and smooth.
 
 
Pour into your prepared crust.
 
 
At this point, you can make meringue if you want.  Nana used to make meringue on all her pies, and it was beautiful.  But most of our family members didn't really care for it, and it was a lot of trouble.  So now we either eat it plain (trust me, it is completely wonderful on its own) or top it with a little bit of Cool Whip.  I'm personally not a big fan of meringue, so I didn't bother with it.
 
But I did have some leftover heavy cream in my fridge...
 
So I threw it in my Kitchen Aid with a little powdered sugar. 
 

There's really nothing like fresh whipped cream...
 
 
Refrigerate the pie for several hours, and it will be ready to eat. 
 
Now comes the real test: Did it set up? 
 
A few years ago, I attempted to make a Butterscotch Pie, and it did not set up.  It tasted good, but it was a runny, goopy mess.  Not cooking long enough or cooking too long can both mess up the texture.  Apparently it's a delicate balance. 
 
This time thanks to Nana's detailed instructions, it turned out perfectly!  It was thick and creamy and delicious.  And let me say, I think the fresh whipped cream put it completely over the top.  Nana would be proud!


Nana's Butterscotch Pie

2 cups milk (at least 2%)
1/3 cup flour
1 cup packed brown sugar
1/4 tsp salt
3 egg yolks
3 Tbs butter
1/2 tsp vanilla
 
1 9-inch pie crust
 
Poke holes in pie crust with a fork.  Bake at 400 about 10 minutes or until golden brown.  Cool completely.
 
Combine flour, brown sugar, and salt in a medium bowl and set aside.  Separate egg yolks and whites.  If making meringue, save whites.  Lightly beat yolks. 
 
Heat milk over medium heat, stirring constantly with a wisk, until it is steaming and small bubbles form around the edges of the pan.  Wisk in dry ingredients. Cook over medium heat, stirring constantly, until thickened (about 5-10 minutes). 
 
Stir several spoonfuls of milk mixture into egg yolks.  Then add egg yolks back to the milk mixture.  Cook over medium heat, stirring constantly.  Bring to a boil and cook several more minutes, until mixture is thick, continuing to stir.  Remove from heat and stir in butter and vanilla. 
 
Pour into baked pie crust.  If desired, top with meringue and bake. 
 
Otherwise, chill in the refrigerator for several hours.  Enjoy plain or top with Cool Whip or fresh whipped cream!
 

~Rachel


Saturday, October 26, 2013

Tomato Basil Soup


Fall is here!  For the last couple of nights, the temperature has dipped down into the 20's.  Definitely soup weather!

I love tomato soup.  There's nothing better on a cold day than a grilled cheese with some good tomato soup.  Luckily, that is one of Jake's favorite meals too, so we have it a lot.  Now Jake is very easy to please.  I could open up a can of Campbell's condensed tomato, and he would be thrilled.  I, however, am a bit pickier about my soup. :)

I've tried several different tomato soup recipes and combined the best of each to come up with my own Tomato Basil Soup.  It is creamy, basil-y tomato goodness.  And it's really very simple to make!

Here's what you need:

Crushed tomatoes, olive oil, fresh garlic, chicken broth, basil (more on this later!), sugar, heavy cream, salt, and pepper
This is enough for a double batch of soup. It freezes really well, so I like to make a lot and freeze it in little containers to take out for a quick lunch or dinner.
 
First, heat some olive oil in a large pot over medium heat. Then add your garlic.
 
 
I absolutely love my Pampered Chef garlic press!  It's probably one of my favorite things I've ordered from them.  You just throw a whole clove in (peeling and all!), squeeze, and it out comes perfectly minced garlic.
 
Saute the garlic until golden brown, about 1-2 minutes. 
 
 
Mmm...there's nothing like the smell of sauteing garlic.
 
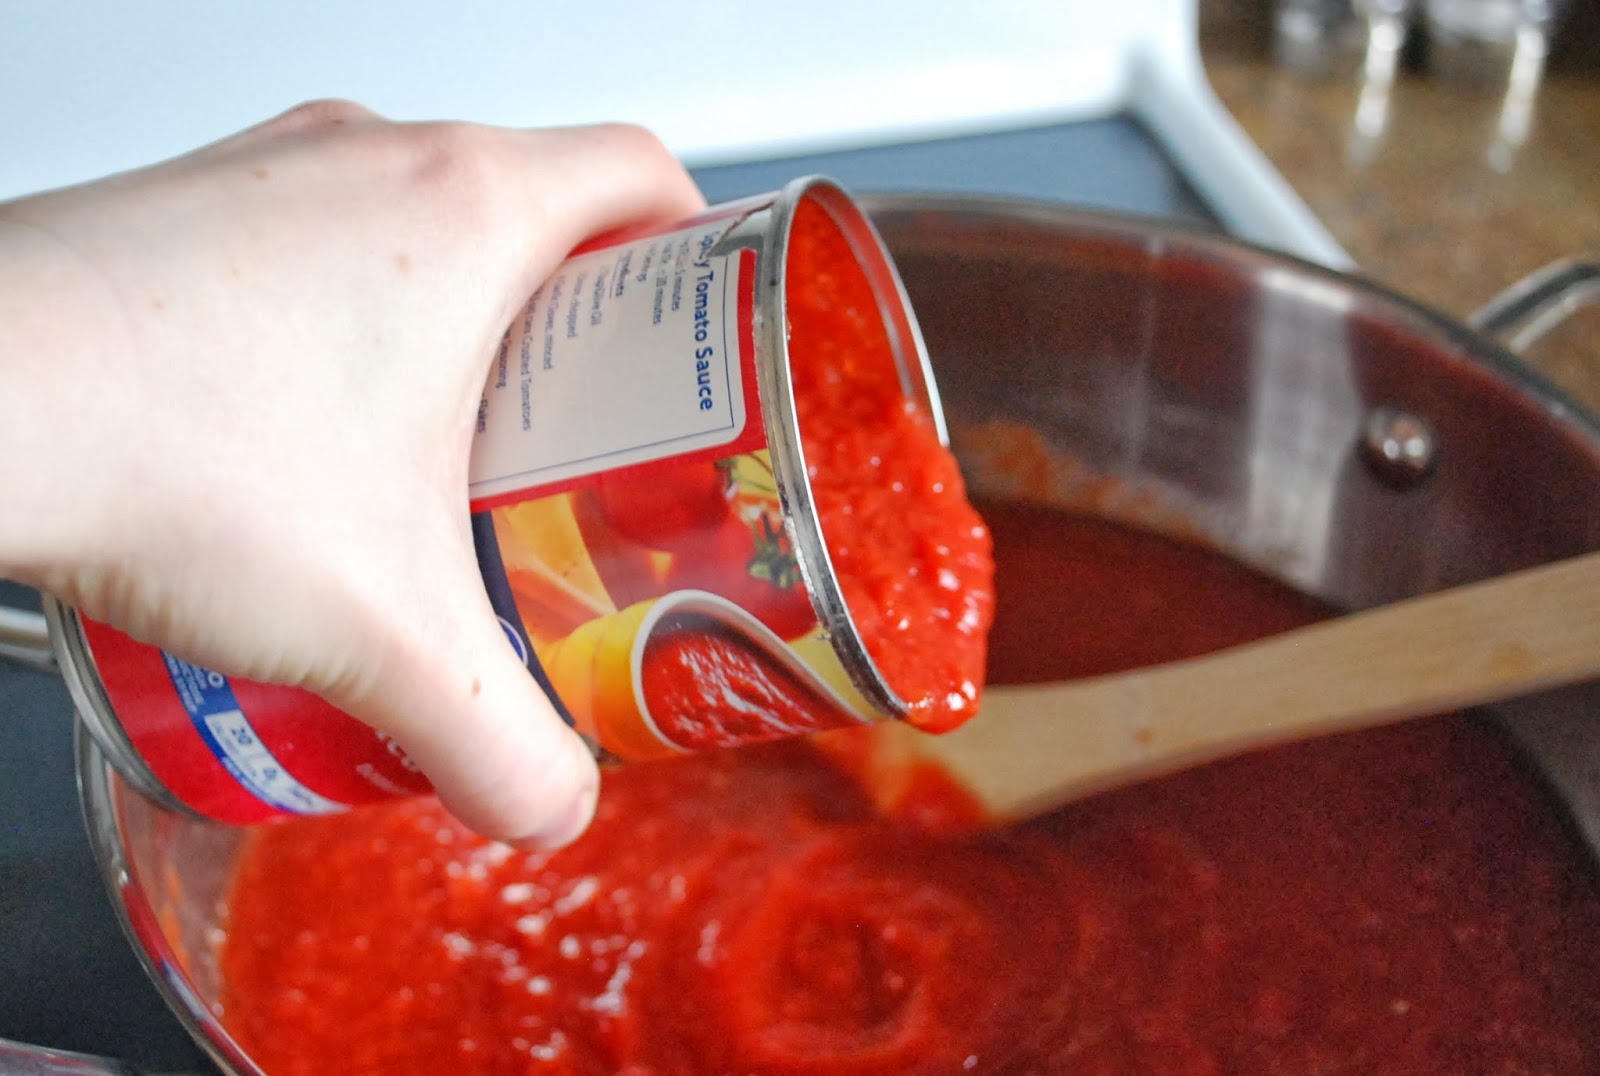
When the garlic is nice and golden, add the crushed tomatoes. 
 
 
I've tried recipes that use tomato puree or a combination of crushed and whole or diced tomatoes, but I really like using all crushed.  It makes the soup nice and thick but not too chunky.
 
Next, add your salt, pepper, sugar, and broth.
 
 
You could also use vegetable broth, but I think chicken broth gives it a good flavor.
 
Let the soup simmer for 10-20 minutes.  I cover it to avoid tomato splatters all over the stove.
 
 
Now for my basil dilemma...
 
I really like to use fresh basil for this soup.  Until a few weeks ago, I would have gone out to my little herb garden and picked some basil.  But alas, the frost has come and all of my herbs have withered and died.  So I had to get my basil from the grocery store.  Unfortunately, the basil at the store was not looking too good.  And it was expensive...over $3 for a pitiful little sprig that barely looked better than my withered plants! 
 
Then I saw this:
 
 
I've seen these fresh herb pastes in the past and been curious but skeptical.  I stood in the store for a minute trying to decide whether to get this or to stop by another store to look for fresh basil.  But my to-to list was long and my time was running short, so I decided to give the paste a try.
 
Verdict?
 
It was pretty good!  Not as good as fresh, but a TON better than dried.  And I had quite a bit leftover that I can use for something else.  Definitely a good alternative when fresh basil is not available!
 
So after the soup has simmered, turn the burner off and add your basil and heavy cream.


The heavy cream is a big part of what makes this soup so delicious.  I have tried substituting milk, but it just doesn't work.  Half and half is okay, but still not the same.  For this recipe, the real stuff is the way to go.
 
And that's it!  


I like to top it with some fresh Parmesan and croutons. 
 
 
Yum!  Now all you need is a grilled cheese! :)
 

Tomato Basil Soup

1 Tbs olive oil
3 cloves fresh minced garlic
3 cans crushed tomatoes
2 cups chicken broth
1 tsp salt
1/4 tsp pepper
1 tsp sugar
1/3 cup heavy whipping cream
2 Tbs fresh basil or basil paste
 
Heat olive oil in a large pot over medium heat.  Add garlic, and saute 1-2 minutes until golden brown. 
 
Add crushed tomatoes. Stir in broth, salt, pepper, and sugar.  Cover and simmer 10-20 minutes. 
 
Remove from heat, and stir in heavy cream and basil. 
 
Enjoy!
 

~Rachel